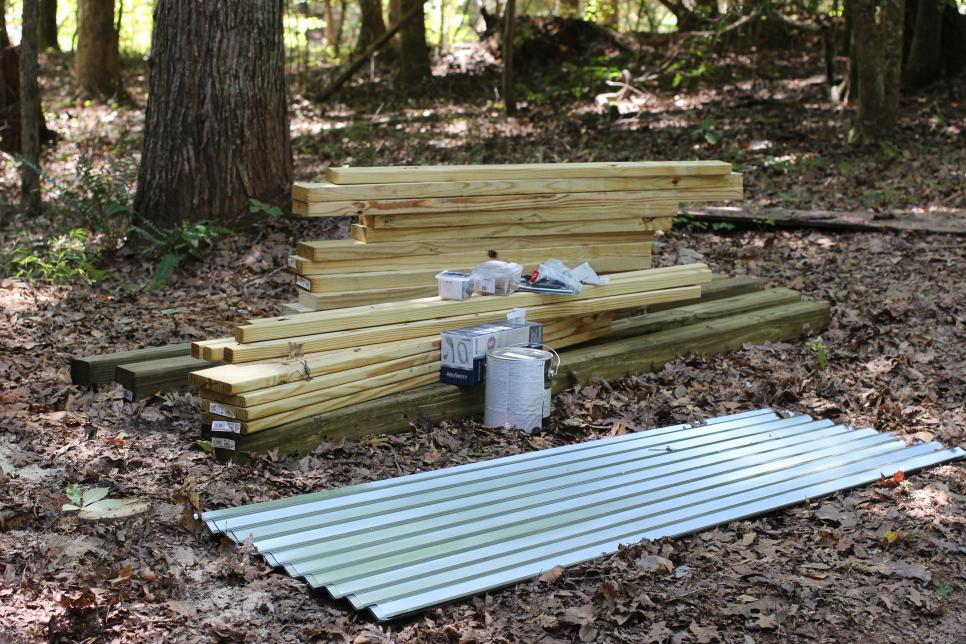
You Will Need Six panels 25-1/2-inch x 72-inch corrugated tin / four 4-inch x 4-inch x 9-foot poles / six 2-inch x 4-inch x 46-1/2-inch boards / six 2-inch x 2-inch x 65-inch boards / 2 5/4-inch x 6-inch x 57-inch planks / one 5/4-inch x 6-inch x 46-1/2-inch planks / 1 3/4-inch x 46-inch galvanized pipe / 2 3/4-inch galvanized pipe flanges / one box 3-inch deck screws / one box #12 x 1-inch roof screws / 1 quart wood stain or paint / shower pipes assembly / 72-inch shower curtain / 1 square yard #57 gravel (optional) / posthole digger / drill with Phillips head screwdriver tip / measuring tape / level / paintbrush
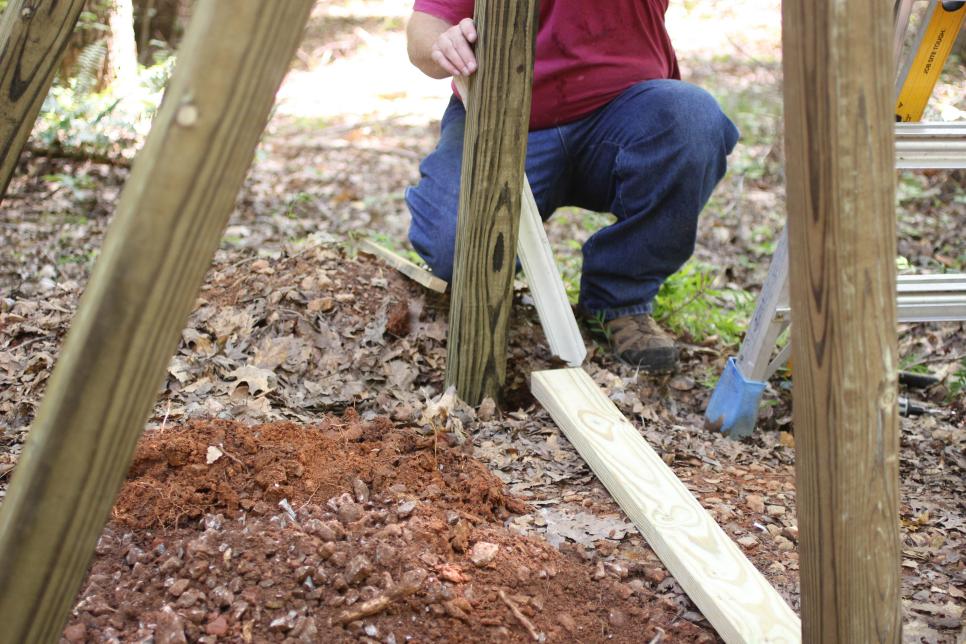
Establish Location Locate a level site with good drainage on that to build your outdoor shower. Select a place to establish the back right corner of the enclosure and then dig a pit 24 inches deep and 6 inches in diameter with a post-hole digger.
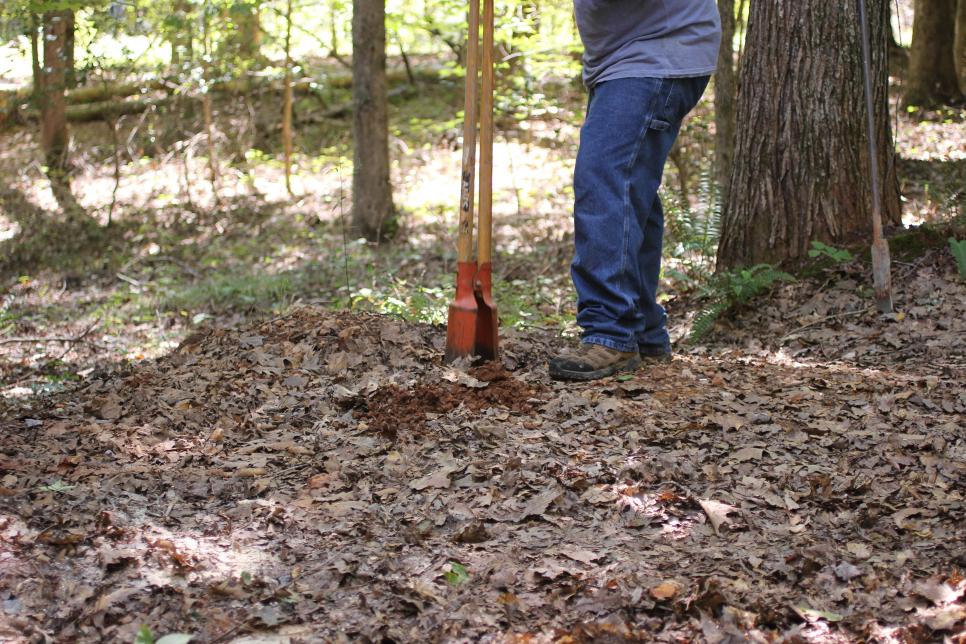
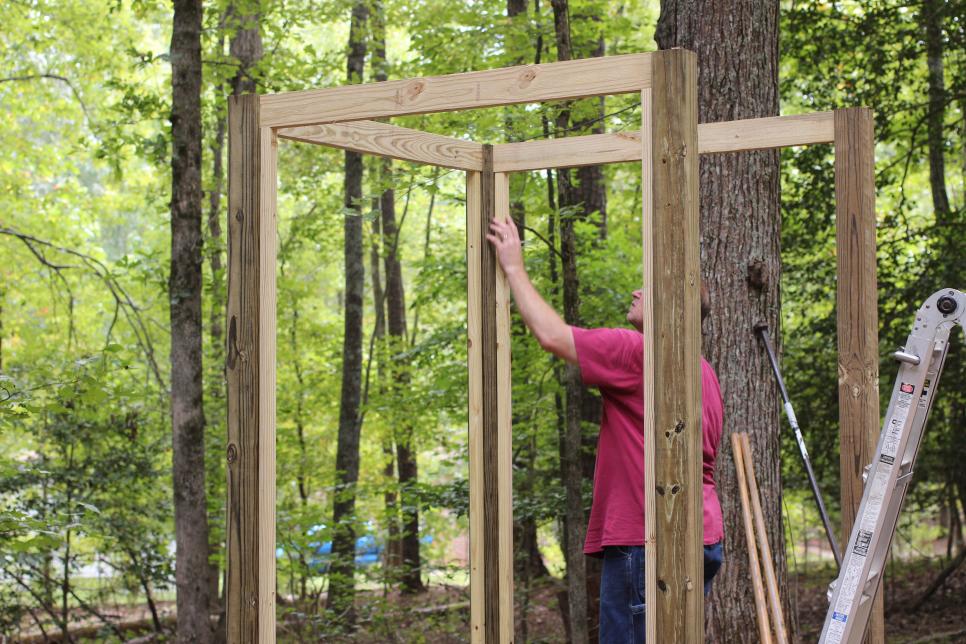
Quantify and Dig Post Holes Dig three more 24-inch-deep post holes spaced at 46-1/2 inches to create a square. The 2-inch x 4-inch x 46-1/2-inch timber to be utilised in later steps might be placed on the ground as spacers instead of measuring tape. Place the 4-inch x 4-inch x 9-foot articles in the holes.
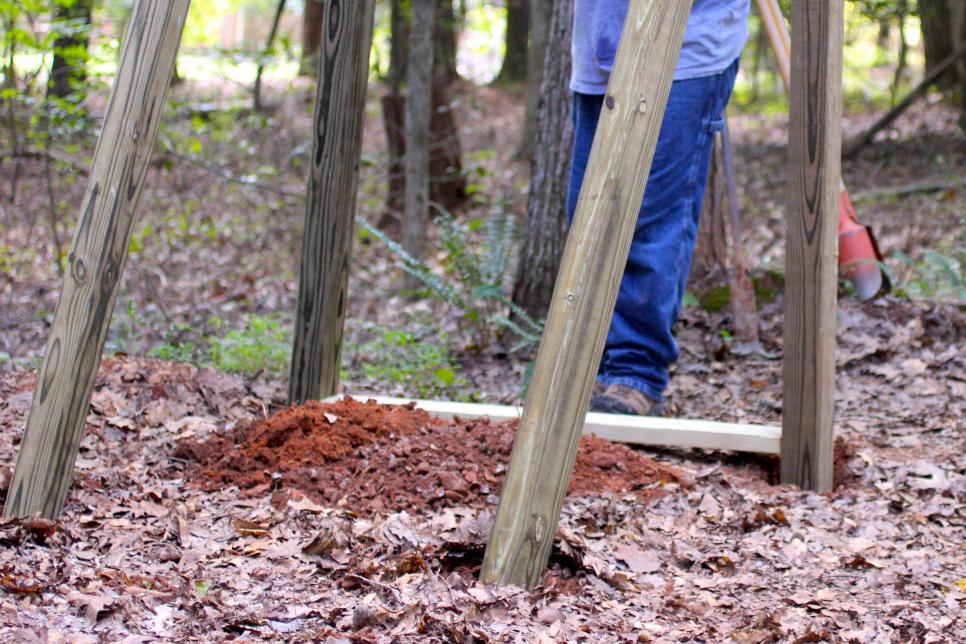
Level Posts Make sure articles rest securely in the pockets and use a level to level and square. All posts should stand in a uniform height of 7 feet. Nail or screw temporary wooden stakes to adjacent sides of every post to maintain in place. Although all articles are theoretically level and perfectly positioned, employing the bets rather than filling the holes in at this time will make it a lot easier to make necessary adjustments as framing is installed.
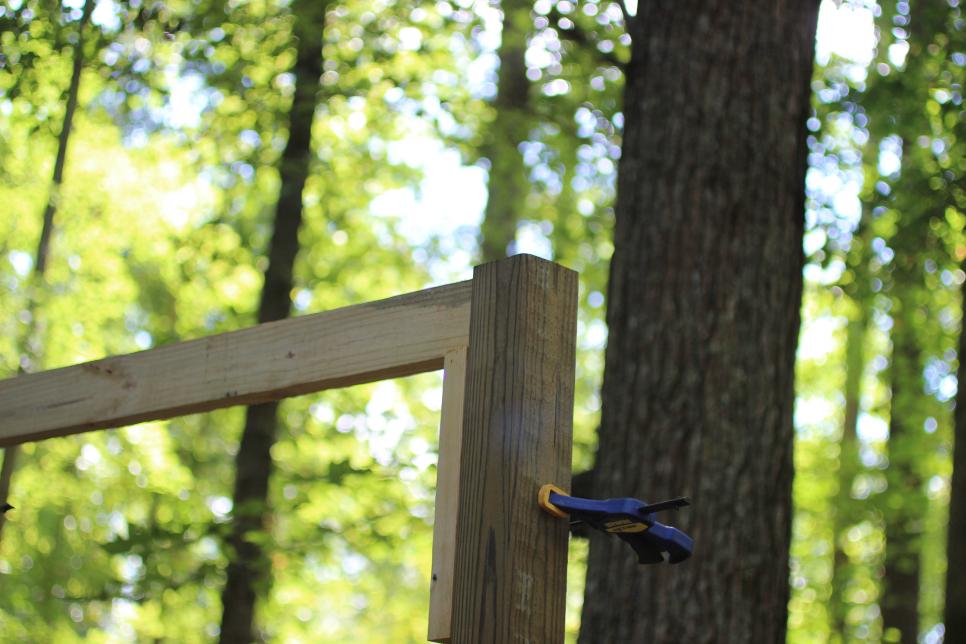
Attach Top Rails Having a helper, span the distance between the articles on the right side with a 2-inch x 4-inch x 46-1/2-inch, using straps to support it. Center and align with the wood flush with the top of each pole. Confirm rail is level (making adjustments as needed) and secure with two 3-inch screws at every post. Remove clamps once protected.
Twist Staying Top Rails Repeat the process shown in preceding step to set secure top rails at the back and at on the left side of the enclosure (leaving the front open).
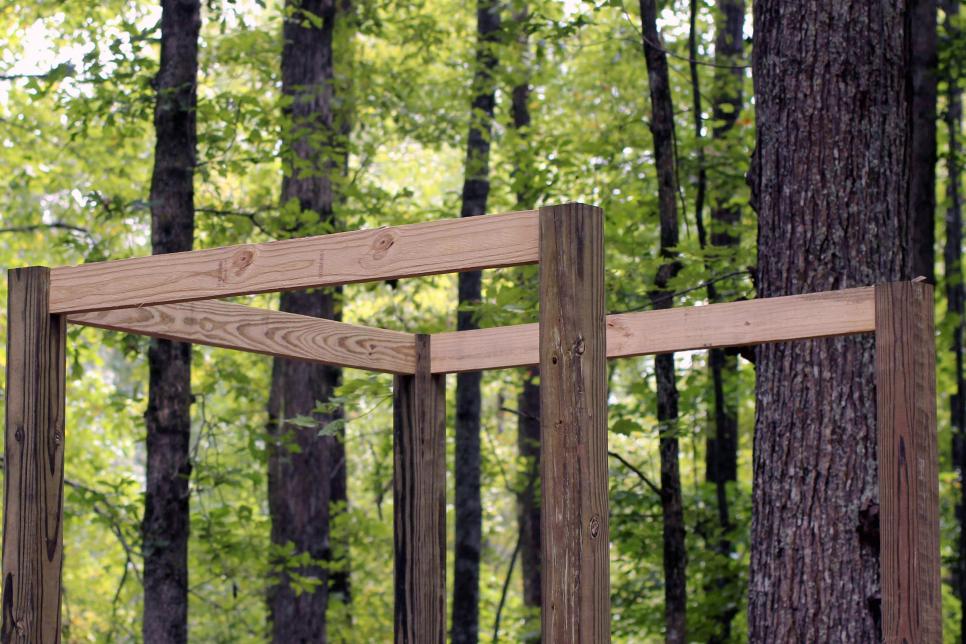
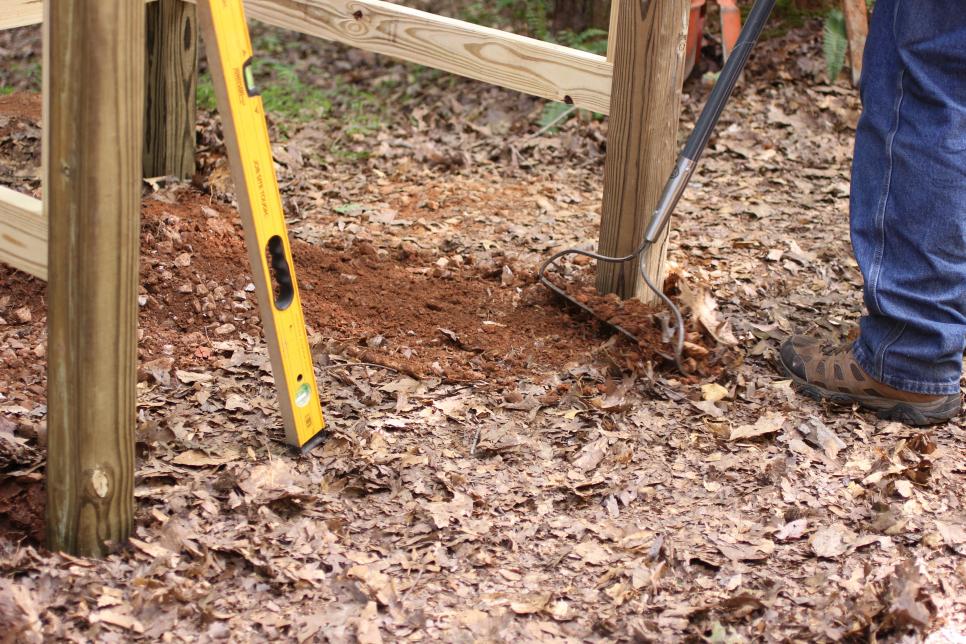
Attach Bottom Rails Mark a spot 12 inches in the ground on each post. Working with one plank at a time, place 2-inch x 4-inch x 46-1/2-inch rails between poles using the same method used to secure top railings. If the floor isn't perfectly flat, alterations will be needed to make sure bottom rails are level before attaching using two 3-inch screws at every post.
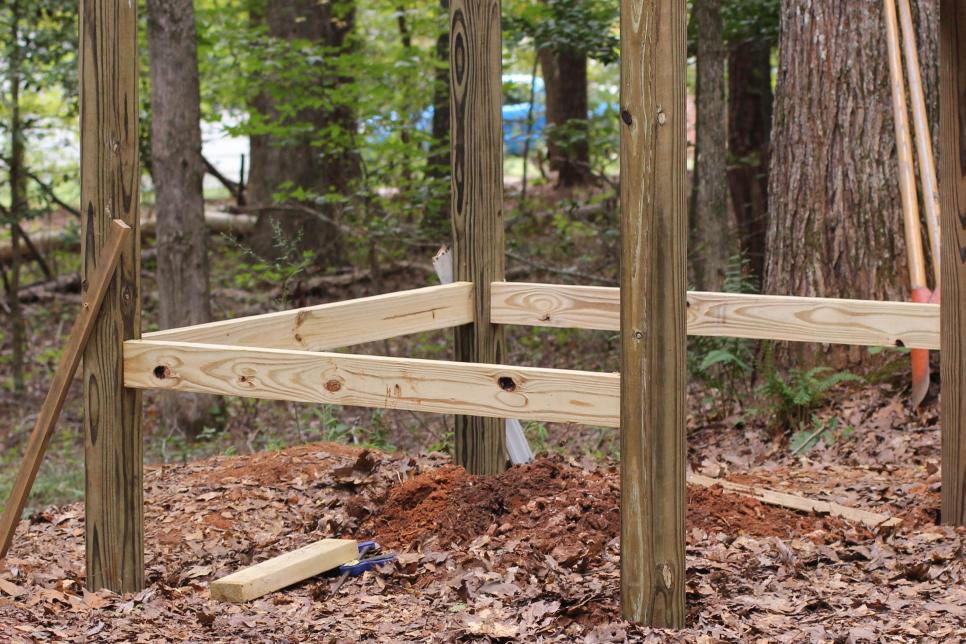
Attach Vertical Braces Put 2-inch x 2-inch x 65-inch rails at each post between the top and bottom railings. The fit will likely be comfy--vertical braces might be tapped into place using a rubber mallet or block of wood. Attach vertical braces to posts with 3inch screws and attach to top and bottom rails by forcing screws in at an angle. The now-completed frames are used to hang the walls and help stabilize the structure.
Attach Top Cap The cap is primarily decorative, but also can help stabilize the enclosure. Place a 5/4-inch x 6-inch x 57-inch plank in addition to the right-hand posts together with the rear end and inside edges flush with the articles. The front of the top rail will overhang by approximately 1-3/4 inches. Secure to articles and top rail using 3-inch screws. Place a 5/4-inch x 6-inch x 46-1/2-inch plank in addition to the back edge of the enclosure, butting the end against the installed side and flush across the inner border. Stable with 3-inch screws and attach another 5/4-inch x 6-inch x 57-inch plank to the top of the left side of the enclosure to complete.

Fill in Post Holes Use a level to check all sides one final time to verify enclosure is level and square. Make any necessary adjustments, then fill in place holes with dirt and pack. In places where weather could be intense or where soil is sandy, the holes could be full of concrete instead of dirt to offer added stability.
Employ Paint or Stain Using stain or paint is an affordable way to add design to even the simplest structures. Here we use a rosewood semi-transparent stain.

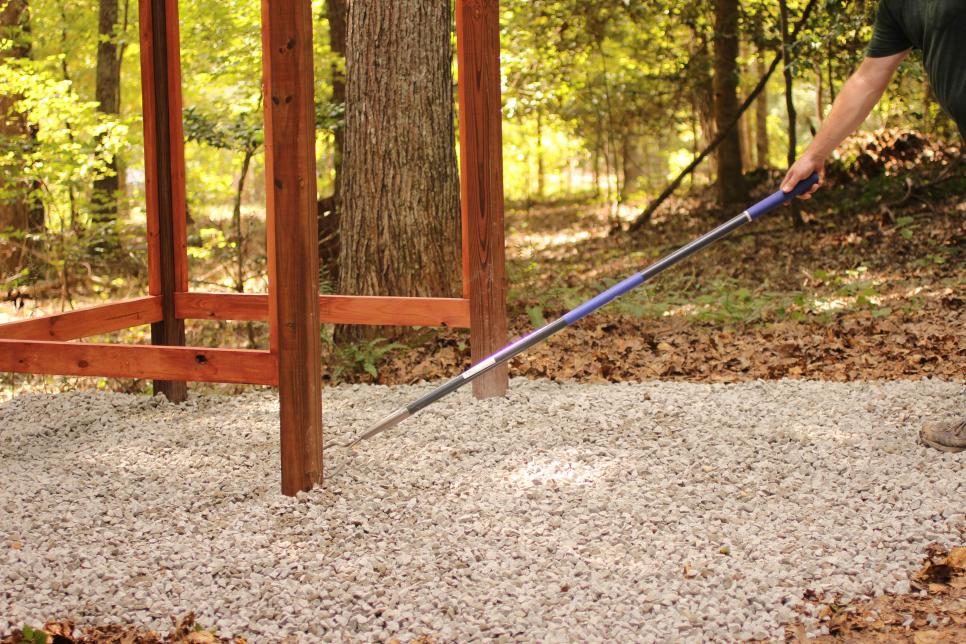
Lay Gravel (Optional) Gravel will assist with drainage and prevent a few locations from turning into a mud pit after prolonged shower use. Although this step is optional, its clean look and functionality go a long way.
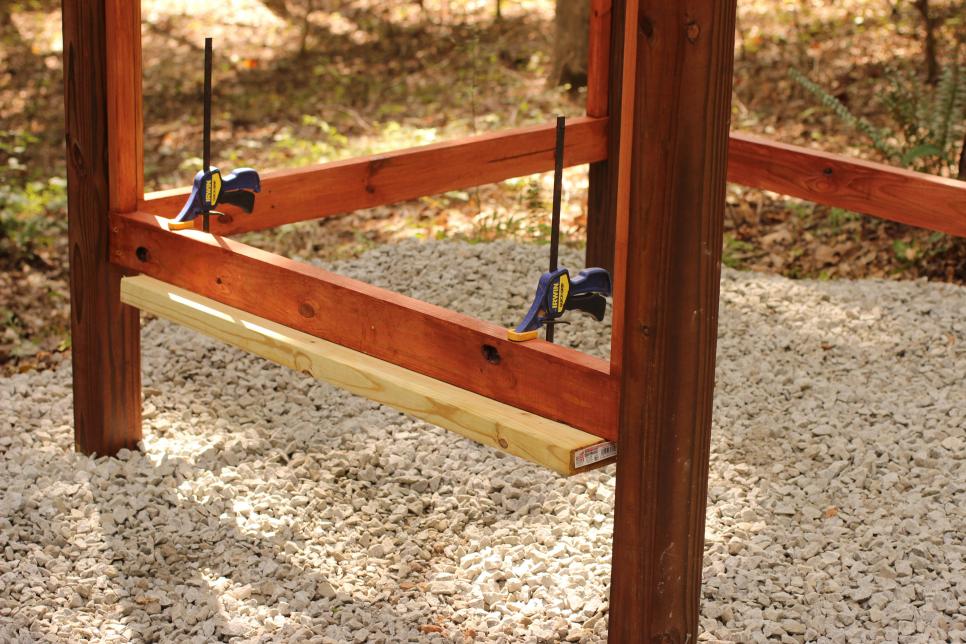
Attach Temporary Support Twist a 2-inch x 4-inch towards the base of a bottom brace using wood clamps affixed from the inside of the enclosure. This temporary brace will help hold the tin siding place while it is attached.
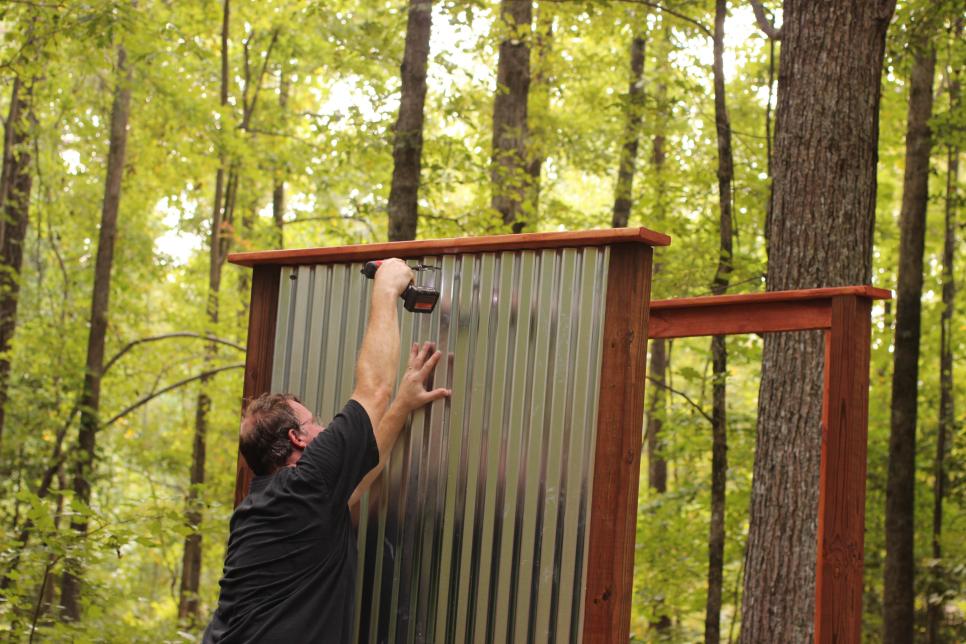
Attach Siding Place a 25-1/2-inch x 72-inch panel of corrugated tin vertically in the very first framework, supported by the temporary brace. Make sure it rests level and sits flush against the frame borders and contrary to corner post. Use roofing screws attach tin to top and bottom rails securely.
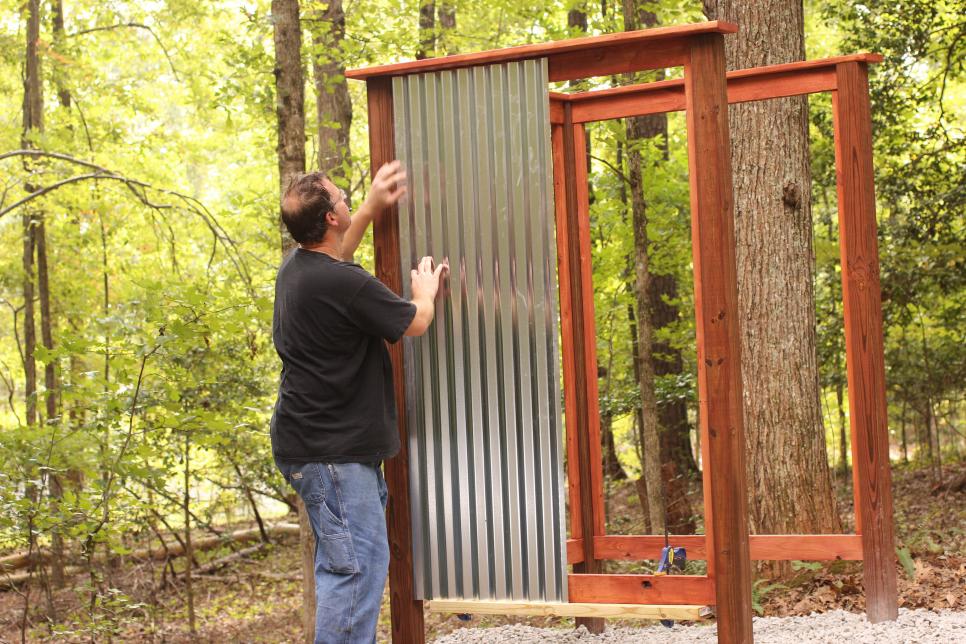
Attach Siding After first panel is secure, add another panel to fill out the side. Anticipate an overlap of 1-1/2 inches in the middle. Attach second panel and repeat the procedure on the trunk and opposing side of the enclosure to complete three-sided enclosure.
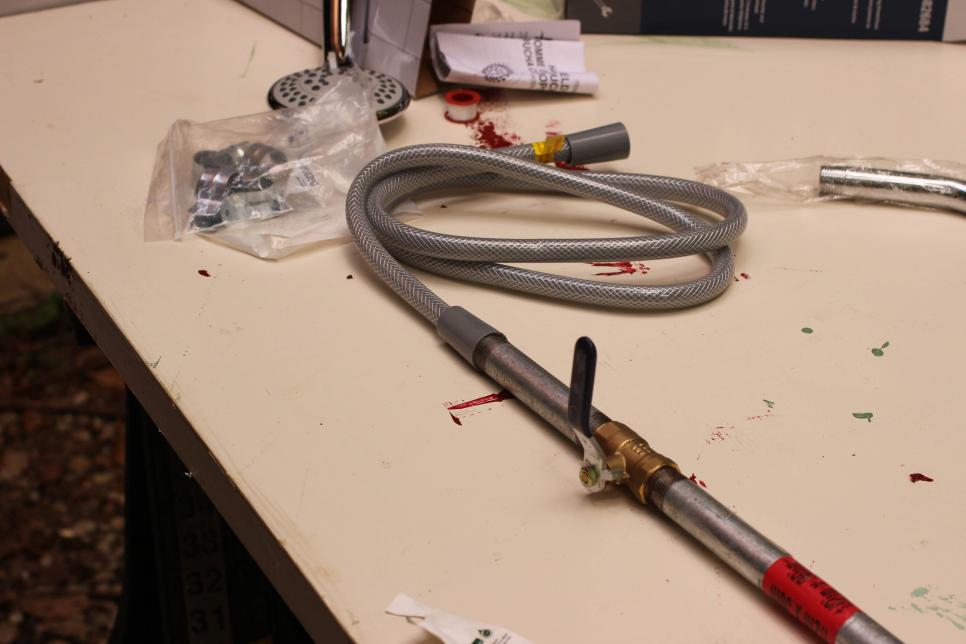
Build Plumbing Shower assemblies may be bought as a kit or put together using cheap parts. Our assembly utilizes one 1/2-inch x 30-inch galvanized pipe, one 1/2-inch x 5-inch galvanized pipe, one 1/2-inch ball valve, 1 hose to 1/2-inch pipe adapter, one 1/2-inch pipe connectors along with a shower head with adjustable hose.
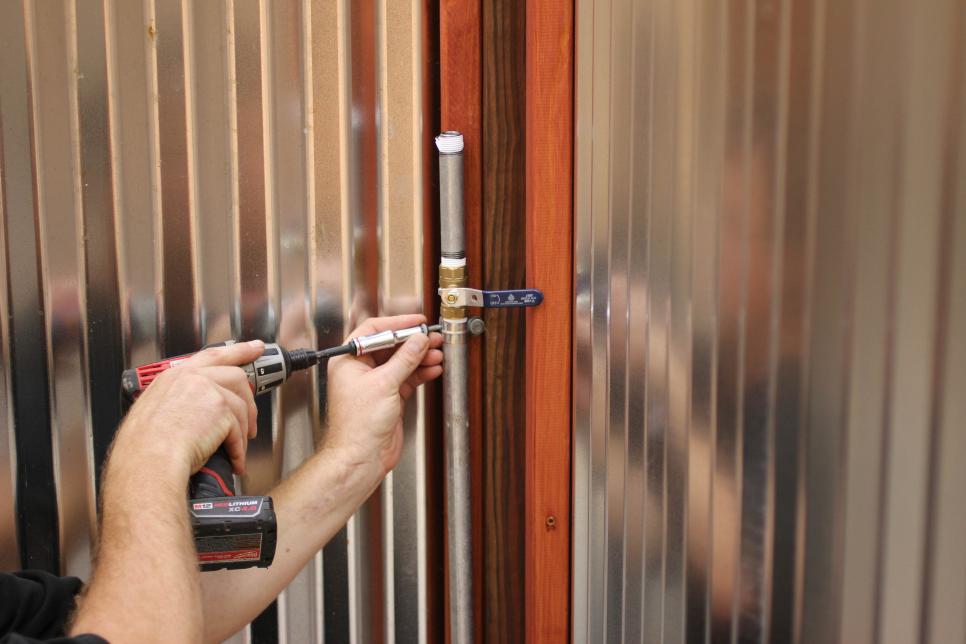
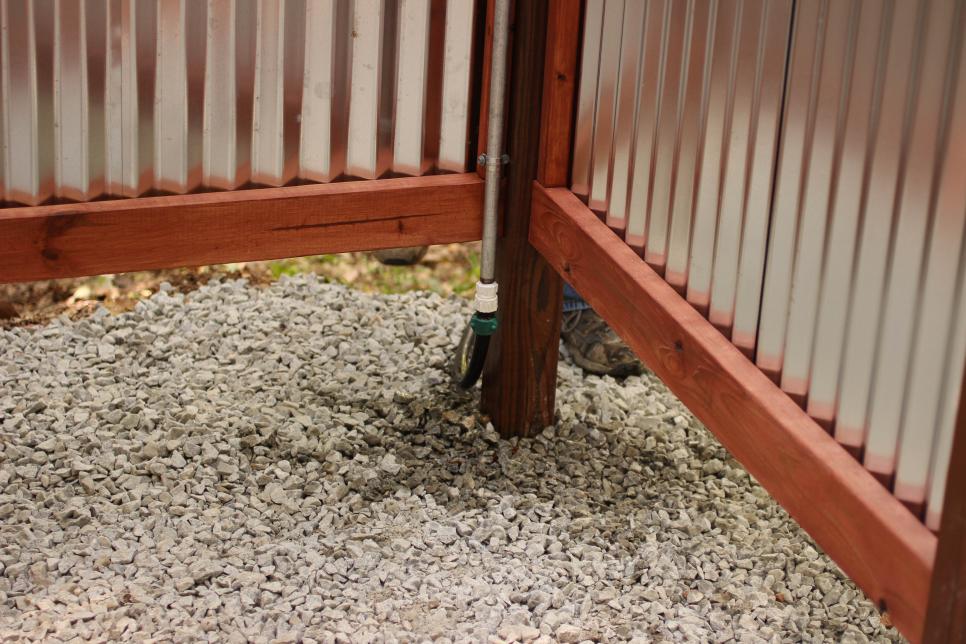
Attach Plumbing to Enclosure Employing pipe straps and 3-inch screws, attach plumbing assembly to the post in either corner of the enclosure. Be sure that the hose attachment extends below the bottom edge of the siding and the valve is easily achieved.
Attach Hose Attach a hose into the bottom of the plumbing meeting. If the shower will be used rarely, the hose may be attached when it will be used. To get a shower that will see regular usage, be sure the hose is protected and doesn't pose a tripping hazard.
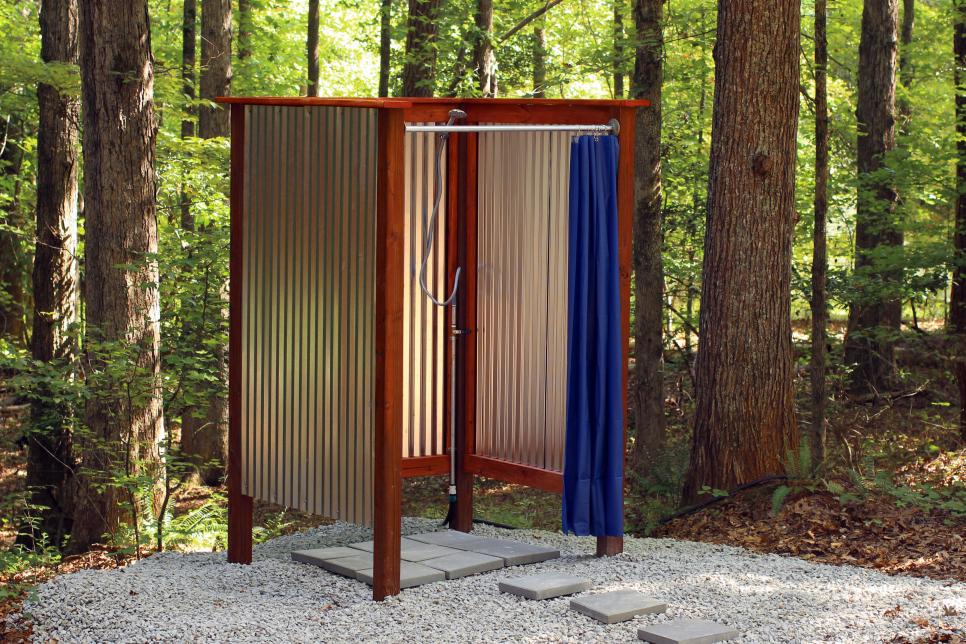
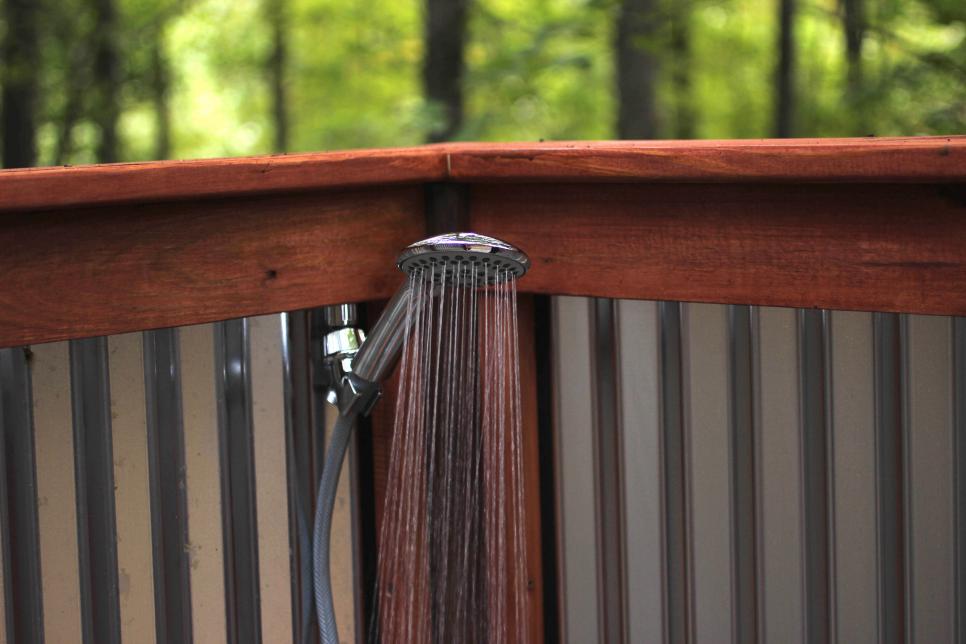
Twist Shower Head Clip Utilize a 3-inch twist to attach the holder to the shower head to the enclosure frame. Turn on the water to be certain that there are no leaks and the holder is well-aimed. Although a rigid shower pipe may be utilized, a handheld fixture is useful for hosing off dirty feet, sand-covered children or muddy dogs.
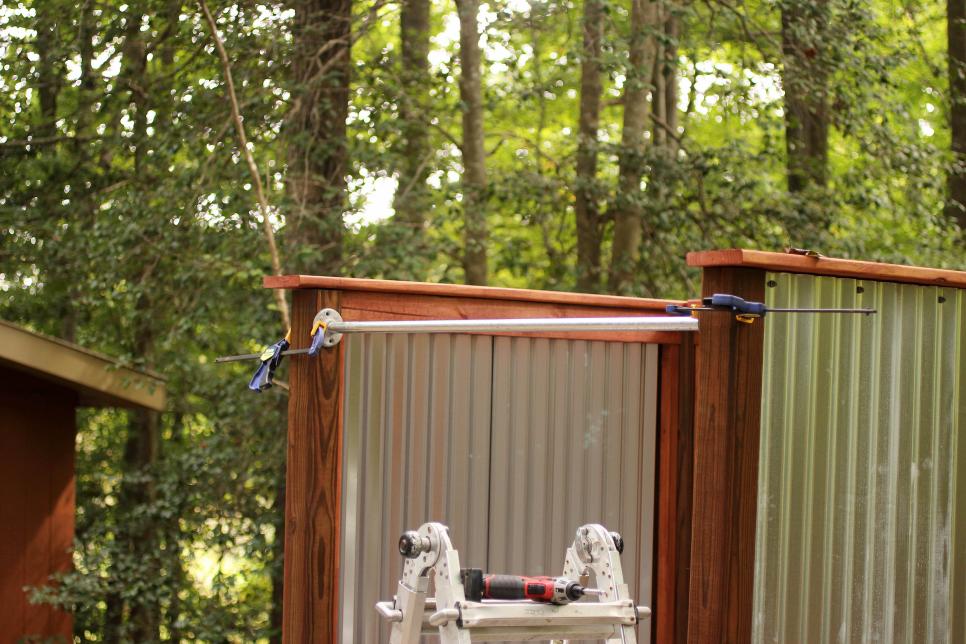
Attach Shower Curtain Rod This sturdy rod doesn't only support a curtain, it helps add significant stability to your arrangement. Measure down 2 inches from the top of the enclosure and combine a 3/4-inch x 46-inch threaded pole throughout the entryway utilizing 3-inch screws to combine two galvanized flanges.
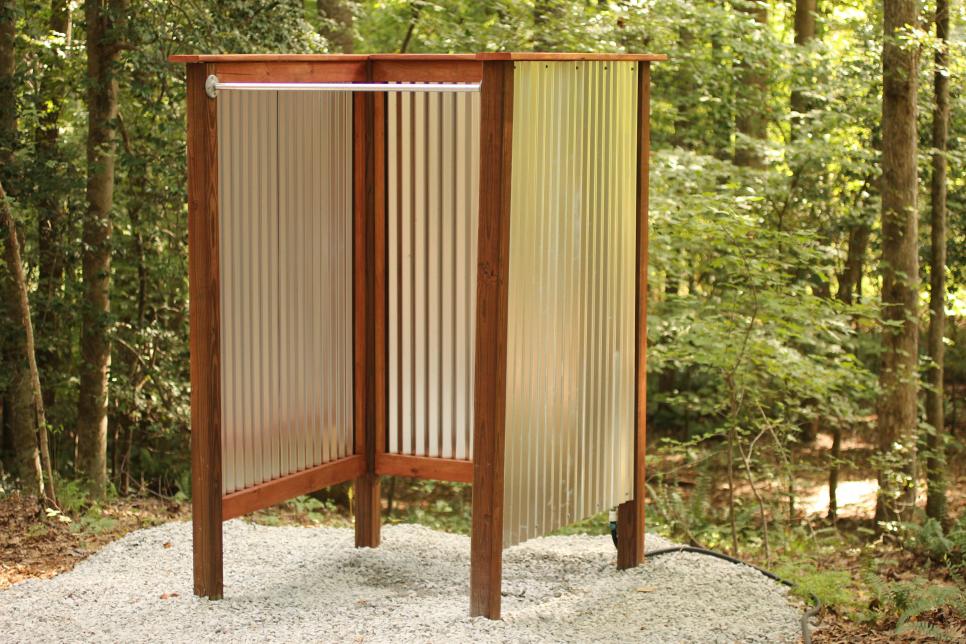
Finishing Touches You can now put in a shower curtain, pavers or other substances to work as a shower floor, extra hooks for hanging towels and your shower is prepared to go.
No comments:
Post a Comment