Provides To make your felted flowers you may need 100% wool felt, 100% wool roving, felting needles and scissors. If you would like to produce a bouquet you'll also need wire stiff enough to hold the weight of your flowers, soap and vinegar. We propose using hand dyed sensed or dying your own to make some depth of colour on your blossoms.

Roses Among the easiest flowers is a rose. For our fragrance we made these miniature rose buds, but you can create your roses any size and any colour you like.
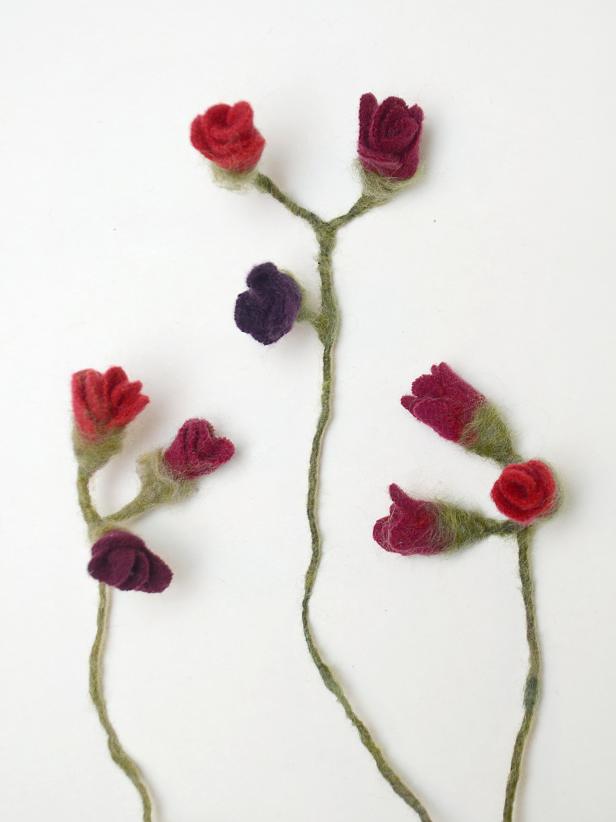
Beginning Your Roses To make your roses you'll require a lengthy strip of felt with arches cut over one side. Experiment with unique styles and dimensions of designs until you locate the one that is perfect for your rose. You will also want some roving in a similar color to the felt.

Create The Rose Center To create your improved beginning at one end of your strip of felt and start coiling the strip around itself. Include a bit of roving between the sensed as you coil it, and also use your felting needle to stab the bottom of the coil along with the roving as you wrap it. Be careful not to stab yourself.

Finishing The Rose When you've finished wrap the felt strip, add a little more roving round the foundation and stab with your felting needle until it is secure. You can make many distinct sizes of roses that way with different sized figurines, and also you are able to make unique styles of roses by altering the style and form of the cuts you create on your felt.

Daisies Daisies are somewhat more complicated than roses as you are going to be working with individual petals, but the possibilities are nearly infinite. Utilize a few petals, or create rich layers with many petals. Create a large center to get a skillet, or leave out the center for a chrysanthemum. You can alter.
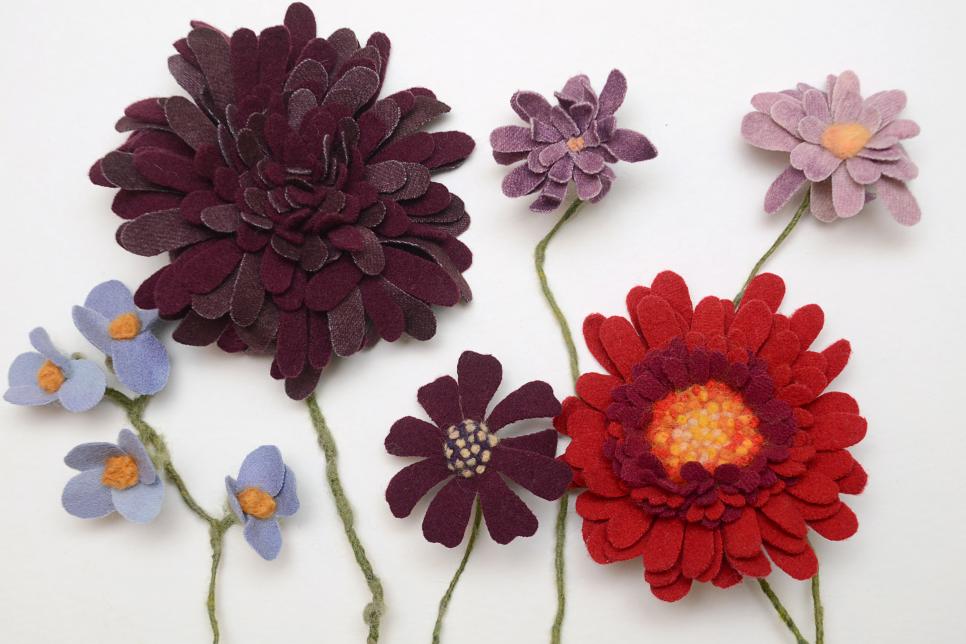
Starting Your Daisies To make your daisies you will have to start by cutting your petals. You can utilize as few as 4 petals, or as long as you have the patience to attach. You can also decide if you want round or pointed petals, and if you'd like them to all be the same size or to grow larger closer to the outside. You will need roving at a similar colour to the petals, and if you'd like your flower to have a centre you will need roving in that colour also.

Create A Daisy Center Produce the center of your daisy by beginning with a chunk of roving. If you'd like a massive center use a massive ball, if you want a little center use a little one. If you don't want a middle, simply put a bit of distance between the petals you are starting with. Put the first few petals from the ball of roving, and add a bit more roving to the outside. Use your felting needle to attach the petals to the center.

Add More Petals If you're incorporating layers of petals around your flower, keep attaching them with layers of roving and the felting needle. Think of the roving as adhesive, it will assist your layers or petals stick together better.
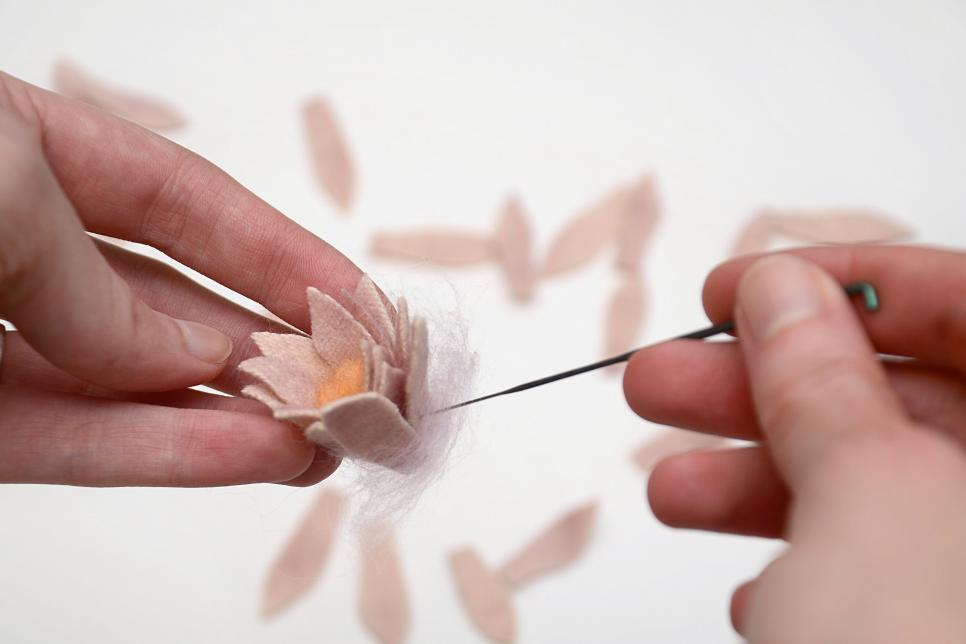
Finishing Your Daisy Finish your daisy the exact same manner that you would complete a rose, with a bit more roving around the base to fasten the petals set up. Then flip the blossom side up and use your felting needle to complete the middle and make slight adjustments to some petals that need it.
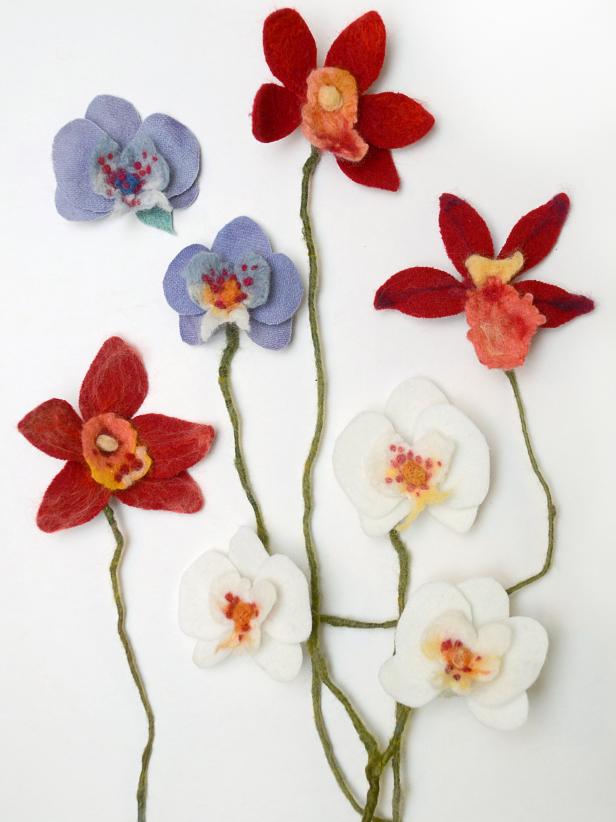
Orchids Orchids are somewhat different than daisies and roses because they need you to custom shape petals with wet felting. When you get the hang of it, you'll have a blast creating unusual and intricate shapes for your flowers.
Beginning Your Orchids To create your orchids you will need to cut out pieces of felt for the flat petals in whatever size and shape you prefer. You will also need roving to shape into the more unusual petals.

Creating Unusual Petals Many flowers, especially orchids, have petals that ruffle or fold in ways that a level piece of felt can't imitate. To create these petals you'll want to do a little bit of wet felting. Begin by arranging the colour of roving you want in about the shape of the petal you are working to create. Make it a bit bigger than you need, it is going to shrink as it felts.

Wet Felting Gently dip the in hot, soapy water. The hotter the water the faster it will sensed, but do not make it so hot your burn yourself. Gently rub on the roving between your fingers and shape the felt as you go. It should only take a few minutes of rubbing to flip your roving into felt. When you are finished squeeze out the excess water and place it out to dry.

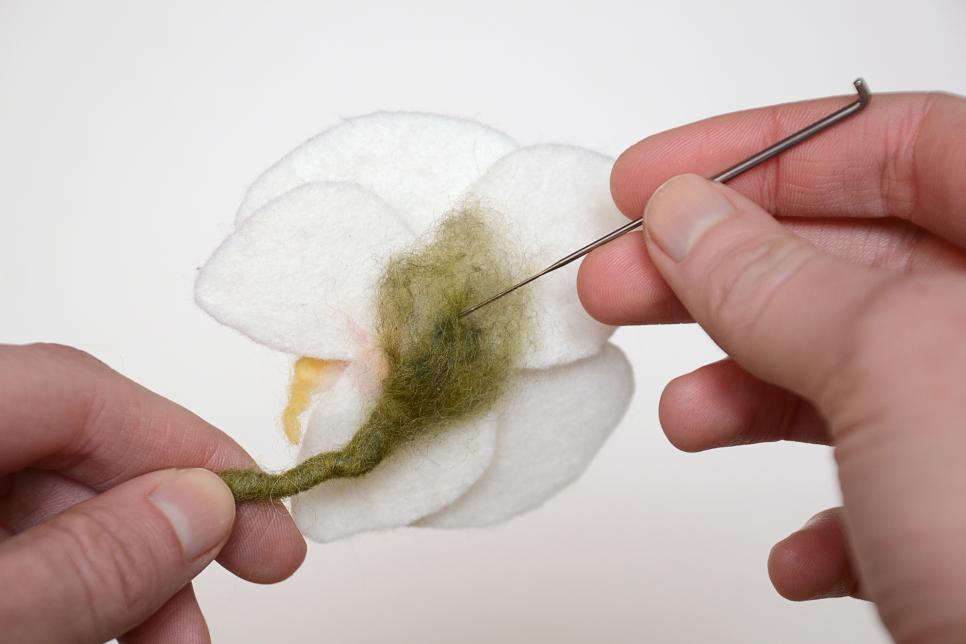
Attaching Orchid Petals Whenever your petal is dry use roving and a felting needle to attach all of your orchid petals together. Use the needle to do some extra shaping your petals may need.
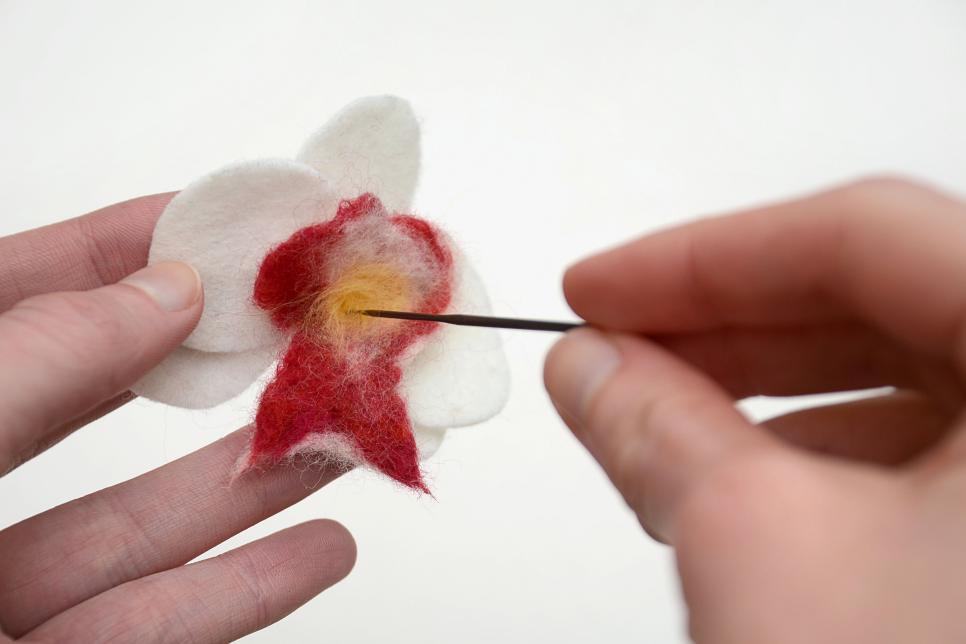
Adding Small Details When your flowers are placed together, you may add little details with bits of roving and your felting needle. Add stripes, spots or only a little bit of colour variation by stabbing the roving to the felt. You can get as detailed as you like, and also make 3 dimensional shapes such as stamens by incorporating thicker layers of roving.

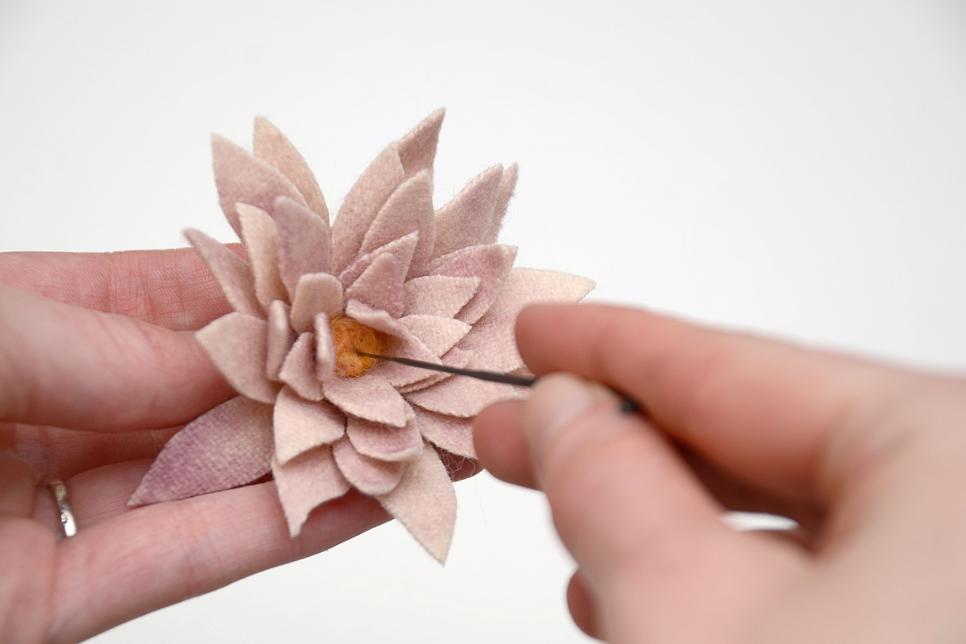
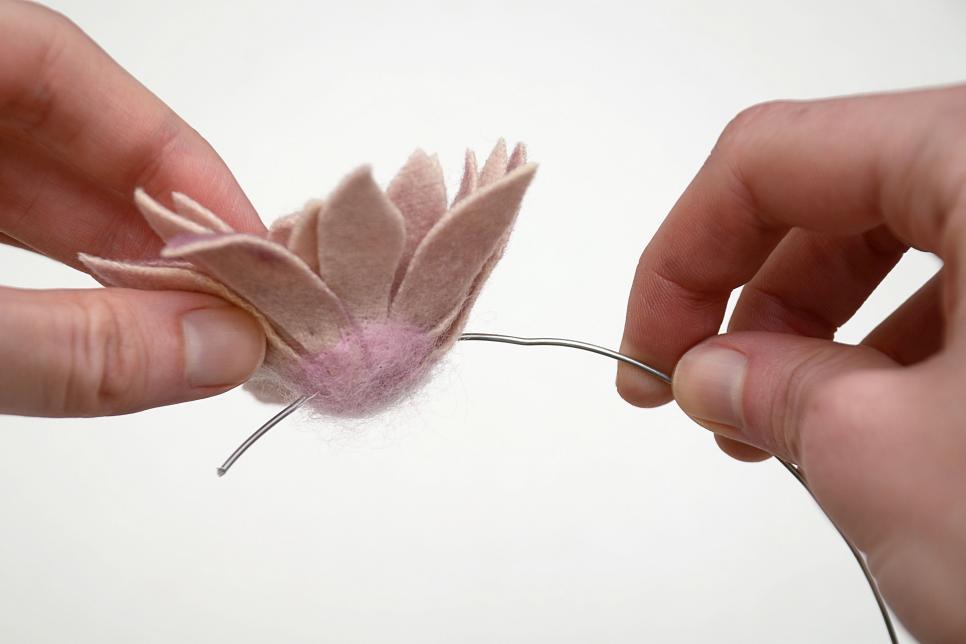
Attaching A Cable Stem Once your flowers are finished if you are creating a fragrance you will want to attach the flowers to cable stems. Cut a piece of wire at an angle so the finish is pointy and sharp. Push it through the bottom of the blossom, careful not to poke yourself when it comes out the other side. Bend the wire end down and turn it round the primary stem to secure.
Covering The Wire Now your flowers are attached to their own wire stems, you will have to cover the wire with wool. Employing long strips of roving, start by wrapping it round the base of the stem where the wire attaches to the blossom. Once the cable at the back is covered, use a felting needle to fasten it to the blossom with a couple stabs.
Wrapping The Stem Continue wrapping the cable, moving down in the base of the flower. Wrap tightly and use your fingers to spin the roving around the wire as you move. You do not have to cover the whole wire, just the part you understand will probably be exposed at the last bouquet.
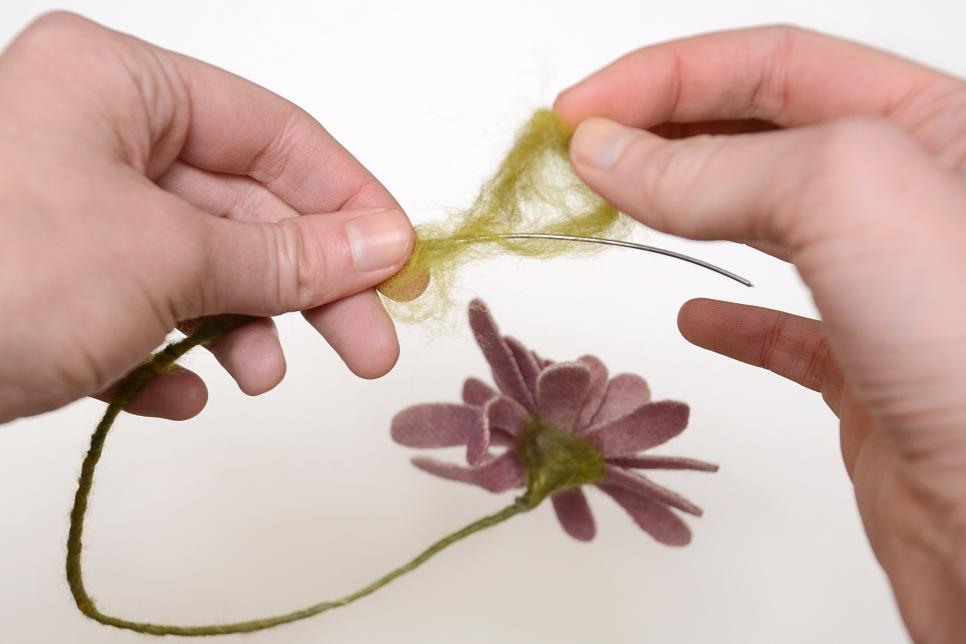
Felting The Stems You will need to do a bit of wet felting to complete your stems. Dip the stalks in warm, soapy water and then rub on the wet felt between your fingers for a moment or so. You're finished when the roving is tight around the wire and will not come back.

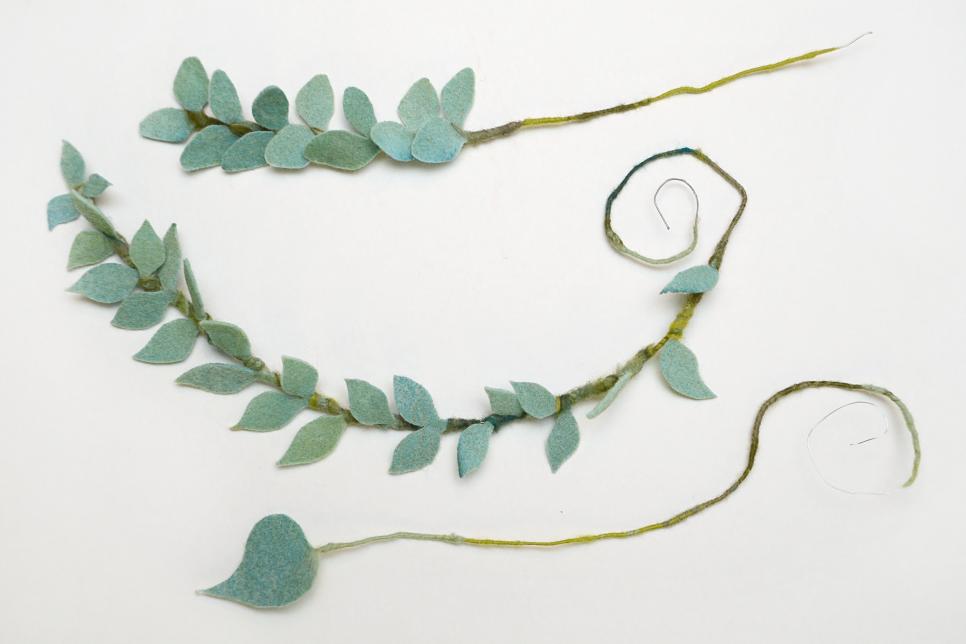
Stems and Leaves Wrapping stems of greenery isn't much different from wrapping your flower stems. Once you've cut out the shapes of the leaves you want, attach them to cable with a bit of hot glue at the end of every leaf. Wrap the stems like you would a flower stem, making sure to cover both the cable and the glue between all the leaves with roving.
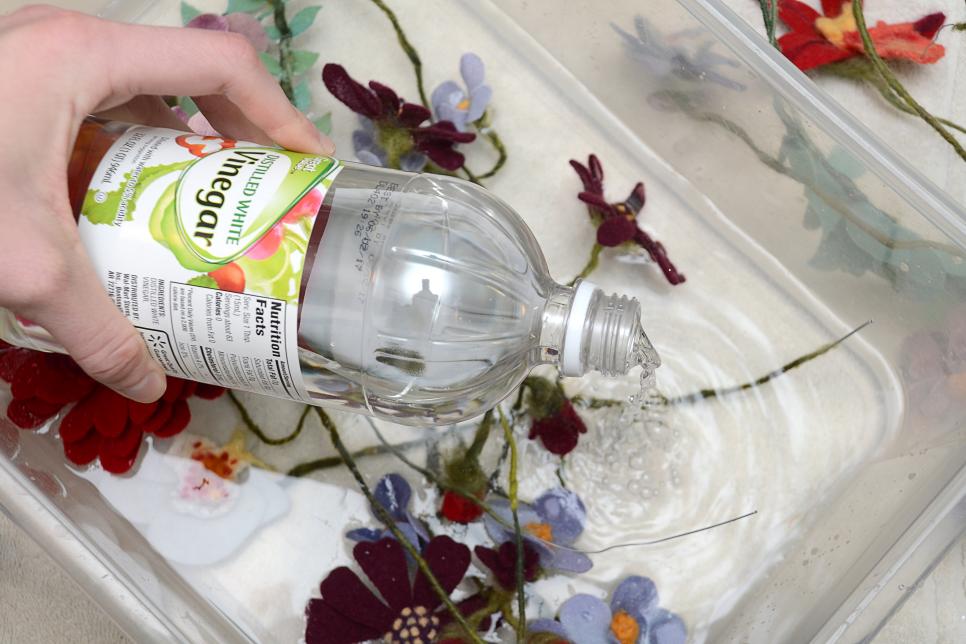
Rinsing Whenever you are finished with all of your wet felting rinse all components which might have soap residue with cold water and a splash of vinegar. A few tablespoons will remove any traces of soap which may shorten the life span of your sensed. Do not worry, that the vinegar odor should not stick around after the sensed is dry.
Arranging Flowers Once your flowers are rinsed and also have completely air dried, you can organize them into a bouquet. We utilized a vase to maintain the blossoms while we ordered them, but choose whatever system works best for you personally. You can bend the stalks in almost any direction you like to create the perfect bouquet.

Wrapping Stems As soon as you're happy with your arrangement, you will have to secure all the stems in place. Wrap outside stems tucking the cable ends. Trim or fold beneath any wires that might cut or shave someone.
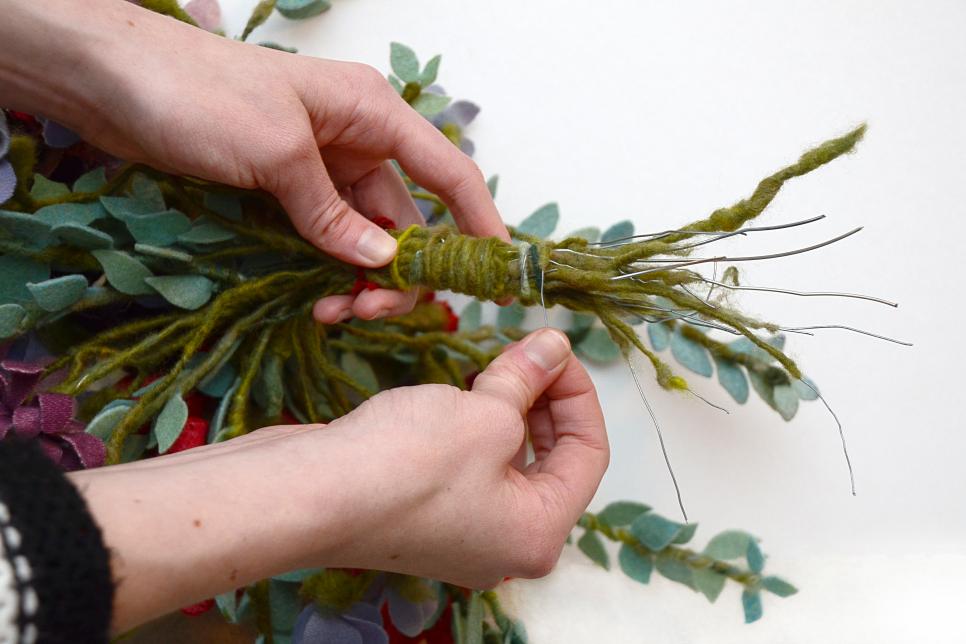
Wrapped Stems Finish your bouquet by covering your group of stalks with something a little more beautiful. We wrapped ours with a little bit of black and red, 100% wool yarn.

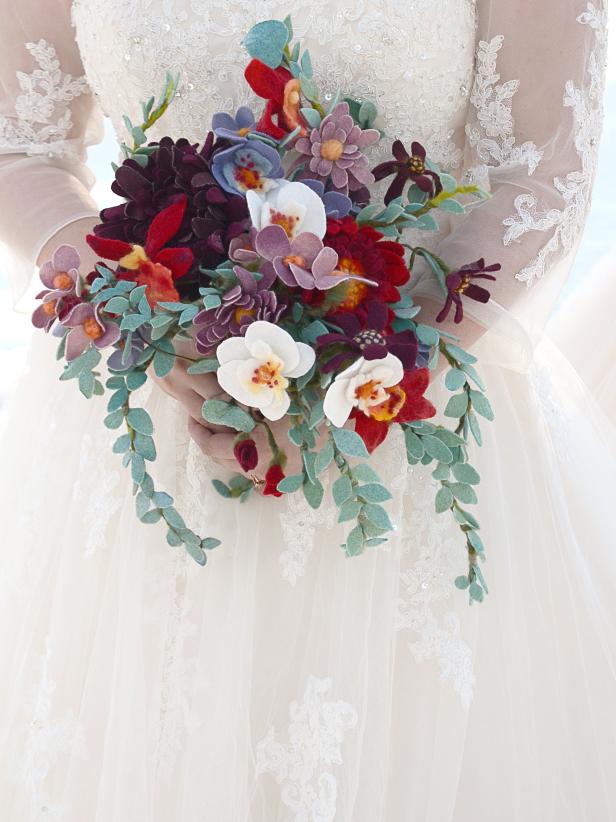
Finished Bouquet Your felted bouquet is now full! Ready for a blushing bride, bridesmaid or even a beautiful vase.

Felted Boutonniere If you've put all of the work into a bouquet, you could too create a matching boutonniere for the groom. All you need to do is put in a safety or boutonniere pin into the rear of the blossom. We made the odd coloring to coordinate perfectly with our groom's suit and accessories.

Felted Bouquet Felting a fragrance isn't fast. In case this is your first time you should plan for approximately 100 hours to create it. If you are willing to make the time, your return is going to be a gorgeous keepsake to treasure forever.

No comments:
Post a Comment